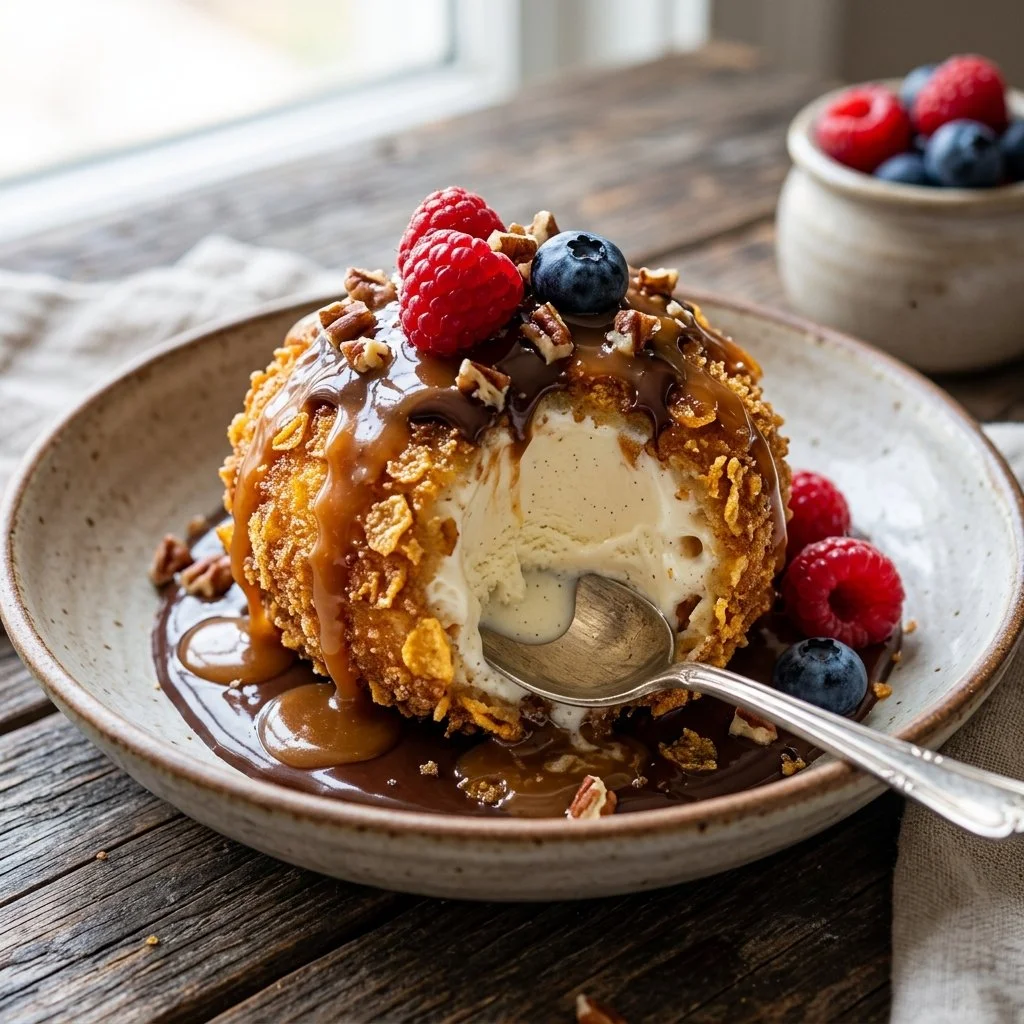
There’s something magical about desserts that can tickle both your taste buds and your sense of adventure. As a child, I remember the thrill of discovering fried ice cream at a local fair. The first bite was an inexplicable joy—crunchy on the outside and impossibly creamy on the inside. It was one of those unforgettable moments that etched itself into my culinary memory. Nowadays, the thought of recreating that delightful experience at home fills my heart with pure bliss. Today, I’m thrilled to share a recipe that brings the nostalgia of fried ice cream right into your kitchen!
Recipe Timing
- Prep Duration: 1 hour 30 minutes (includes freezing time)
- Active Cooking: 15 minutes
- Total Duration: 1 hour 45 minutes
- Portion Size: Serves 4
- Complexity: Simple
Nutritional Recipe
- Calories per portion: Approximately 400
- Protein: 5 grams
- Carbs: 45 grams
- Fats: 21 grams
- Fiber: 2 grams
- Sugars: 18 grams
- Sodium: 250 mg
Why You’ll Love This Fried Ice Cream
Fried ice cream is not just a dessert; it’s an experience that you can share with family and friends. With every crunchy bite, you’ll find the sweet, melting vanilla ice cream nestled inside. It’s the perfect combination of textures and flavors, with a delightful hint of coconut and cereal providing a delicious backdrop. And let’s not forget the luxurious drizzle of chocolate sauce and the lightness of whipped cream. It’s dessert that feels indulgent yet playful—just the way we like it!
The Complete Cooking Journey
Creating fried ice cream is as much about the process as it is about the end result. When you scoop the cold, creamy vanilla ice cream into perfect spheres, it’s like molding tiny little clouds of joy. From setting up your breading station to watching the ice cream balls transform in hot oil, the excitement builds with every step. You’ll feel proud as you serve this decadent dessert to your loved ones, with magical memories in every bite.
Ingredients:
- 1 quart vanilla ice cream
- 1 cup cornflakes, crushed
- 1 cup coconut flakes
- 1 cup all-purpose flour
- 2 eggs, beaten
- Vegetable oil for frying
- Chocolate sauce for drizzling
- Whipped cream for serving
Method:
Step 1: Scoop and Freeze the Ice Cream
Scoop ice cream into balls and freeze for at least 1 hour until firm. This is crucial, as it helps the ice cream maintain its shape during frying.
Step 2: Set Up Your Breading Station
Prepare your breading station by setting up three bowls. Fill one bowl with flour, another with beaten eggs, and the last with a mix of crushed cornflakes and coconut flakes. This will make the coating process easy and organized.
Step 3: Bread the Ice Cream Balls
Roll the frozen ice cream balls in the flour, making sure to coat them evenly. Next, dip them into the beaten eggs and finally coat them with the cornflake and coconut mixture. Be generous with the coating to achieve that crunchy crust!
Step 4: Freeze Again
After coating, freeze the breaded ice cream balls again for about 30 minutes. This step ensures they are extra firm and holds up beautifully when fried.
Step 5: Heat the Oil
In a deep fryer or a large pot, heat vegetable oil to 375°F (190°C). This temperature is perfect for getting that nostalgic golden brown coating.
Step 6: Fry the Ice Cream Balls
Fry the ice cream balls in the hot oil for about 10-15 seconds until golden. Watch as the coating bubbles and crackles, creating a warm, inviting aroma in your kitchen.
Step 7: Drain and Serve
Remove the fried ice cream from the oil and let it drain on paper towels for a moment. Serve immediately, drizzled with irresistible chocolate sauce and topped with a generous dollop of whipped cream.
Serving Suggestions & Pairings
Fried ice cream is truly delightful on its own, but feel free to elevate your dessert experience by pairing it with fresh fruit like strawberries or bananas. A side of crispy churros or a small bowl of warm chocolate sauce can also enhance the indulgence, adding layers of flavor and texture.
Storage & Leftovers Guide
While fried ice cream is best enjoyed fresh, if you have any leftovers (which is rare!), store them in an airtight container in the freezer. They should maintain their texture for up to 3 days, but be aware that reheating may not produce the same crunchy experience.
Kitchen Wisdom & Success Tips
- Keep your oil hot: Ensure that your oil is at the right temperature before frying. If it’s not hot enough, the coating may absorb too much oil.
- Don’t overcrowd the pot: Fry in small batches to maintain the oil temperature and achieve an even golden color.
- Customize your toppings: Experiment with different sauces, like caramel or strawberry, to make your fried ice cream uniquely yours.
Flavor Variations & Adaptations
Feel free to play with flavors! Swap the vanilla ice cream for chocolate or mint, or add spices like cinnamon to your coating for a twist. You could even add crushed nuts or chocolate chips to the cornflake mixture for extra crunch and texture.
Reader Questions & Solutions
-
Q: Can I use other types of cereal?
- A: Absolutely! Try using rice cereal or a cinnamon-flavored option for a different taste.
-
Q: Is it possible to bake instead of fry?
- A: While frying produces the best texture, you can try baking for a healthier alternative. Just keep an eye on them in the oven!
-
Q: How can I prepare this in advance?
- A: You can fully prep the ice cream balls and freeze them up to a day ahead. Just coat and fry them when you’re ready to serve.
-
Q: What if my ice cream melts too quickly?
- A: Work quickly and keep the ice cream in the freezer as long as possible. Chill your bowls and tools as well for extra help!
-
Q: How can I make this without frying?
- A: Follow the same steps but opt for an air fryer if you have one! It won’t be quite the same, but you can still enjoy a healthier version.
Wrapping Up
This fried ice cream recipe brings a piece of childhood delight into our home kitchens, allowing us to create memories that will last a lifetime. So gather your ingredients, invite your loved ones, and prepare to embark on a fun-filled cooking adventure that promises to end with smiles and satisfied taste buds. Enjoy every step of the process, and happy cooking!
PrintFried Ice Cream
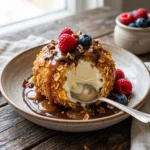
A magical dessert that combines crunchy coating with creamy vanilla ice cream, perfect for sharing with family and friends.
- Prep Time: 90 minutes
- Cook Time: 15 minutes
- Total Time: 105 minutes
- Yield: 4 servings 1x
- Category: Dessert
- Method: Frying
- Cuisine: American
- Diet: Vegetarian
Ingredients
- 1 quart vanilla ice cream
- 1 cup cornflakes, crushed
- 1 cup coconut flakes
- 1 cup all-purpose flour
- 2 eggs, beaten
- Vegetable oil for frying
- Chocolate sauce for drizzling
- Whipped cream for serving
Instructions
- Scoop and freeze the ice cream into balls and freeze for at least 1 hour until firm.
- Set up your breading station with three bowls: one for flour, one for beaten eggs, and one for a mix of crushed cornflakes and coconut flakes.
- Bread the ice cream balls by rolling them in flour, dipping them in beaten eggs, and coating them with the cornflake and coconut mixture.
- Freeze the breaded ice cream balls again for about 30 minutes.
- Heat vegetable oil in a deep fryer or large pot to 375°F (190°C).
- Fry the ice cream balls in the hot oil for about 10-15 seconds until golden brown.
- Drain on paper towels and serve immediately, drizzled with chocolate sauce and topped with whipped cream.
Notes
Keep oil hot and do not overcrowd the pot for even frying. Customize toppings to your liking.
Nutrition
- Serving Size: 1 serving
- Calories: 400
- Sugar: 18g
- Sodium: 250mg
- Fat: 21g
- Saturated Fat: 10g
- Unsaturated Fat: 7g
- Trans Fat: 0g
- Carbohydrates: 45g
- Fiber: 2g
- Protein: 5g
- Cholesterol: 100mg