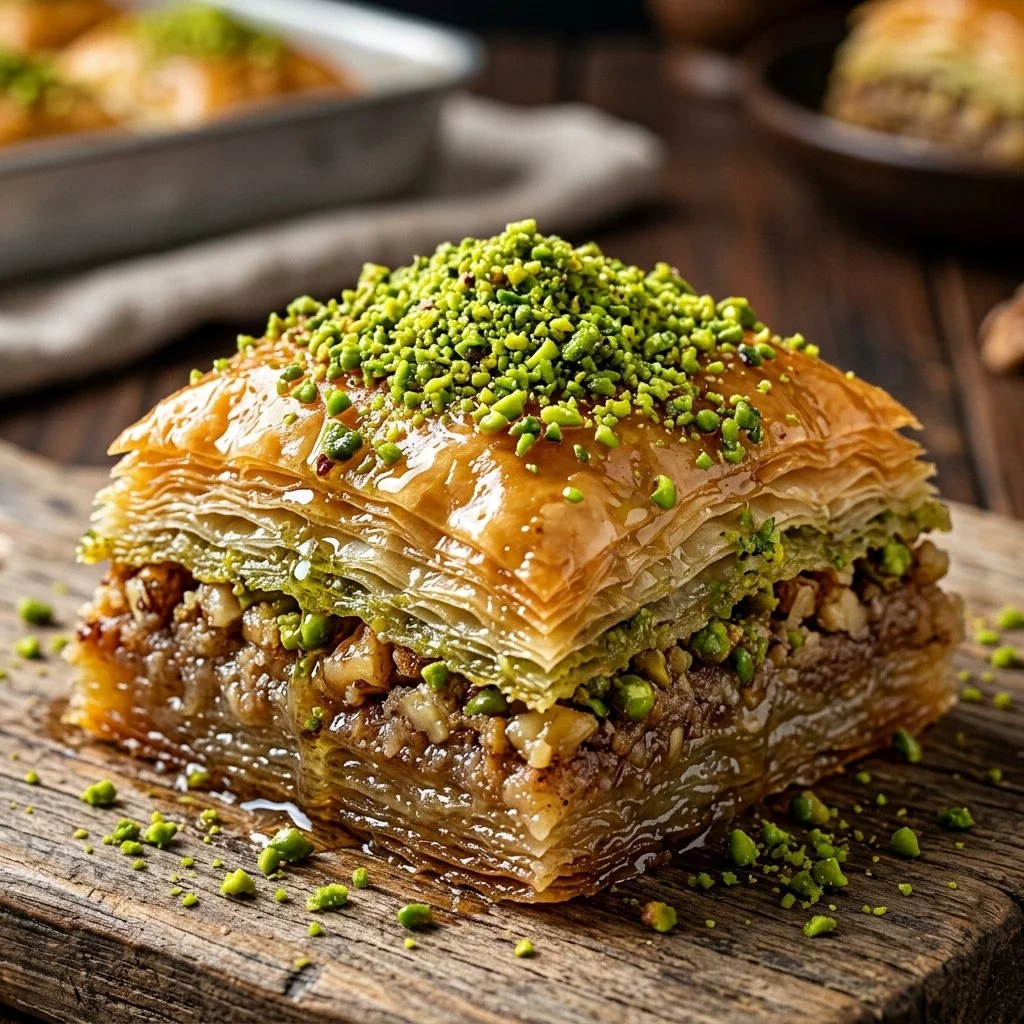
There’s something special about the alluring aroma of baklava wafting through the kitchen. It’s the kind of dessert that calls to everyone, blending warm spices with the sweet scent of honey and nuts. I first encountered baklava at a family gathering, where my aunt, with a flourish, removed her golden tray from the oven. The anticipation in the air was palpable as she drizzled the syrup over the warm layers of flaky goodness. That moment left a lasting impression on me—both the rich flavors and the love that went into its preparation. Today, I want to share my version of this enchanting dessert, so you can bring a piece of that warmth into your own home.
Recipe Timing
- Prep Duration: 30 minutes
- Active Cooking: 50 minutes
- Total Duration: 1 hour 20 minutes
- Portion Size: 20 servings
- Complexity: Simple
Nutritional Recipe
- Calories per portion: 300
- Protein: 5 grams
- Carbs: 33 grams
- Fats: 19 grams
- Fiber: 2 grams
- Sugars: 12 grams
- Sodium: 5 mg
Why You’ll Love This Baklava Recipe
This baklava recipe is not just a treat for your taste buds; it’s a wonderful way to connect with generations of culinary tradition. The delicate layers of phyllo dough, the crunch of spicy walnuts, and the glossy syrup artfully transform simple ingredients into an indulgent dessert. Plus, it’s surprisingly easy to whip up at home! It’s an excellent choice for gatherings and celebrations, inviting you to share that ambrosial experience with family and friends.
The Complete Cooking Journey
Imagine gathering around a warm, inviting table, with a tray of freshly baked baklava in the center. The golden, flaky layers beckon as you cut into it, exposing the luscious filling that defines this beloved treat. With each bite, the sweet richness of honey and warm hints of cinnamon meld together, creating an unforgettable symphony of flavors. So, let’s dive into this baking adventure and create your very own batch of baklava!
Ingredients:
- 1 pound phyllo dough
- 1 cup unsalted butter, melted
- 2 cups walnuts, finely chopped
- 1 cup sugar
- 1 teaspoon ground cinnamon
- 1 cup water
- 1/2 cup honey
- 1 teaspoon vanilla extract
Method:
Step 1: Preheat the Oven
Preheat the oven to 350°F (175°C) and grease a 9×13 inch baking dish. This step sets the foundation for our baklava to bake evenly and beautifully.
Step 2: Prepare the Nut Mixture
In a bowl, mix together the chopped walnuts, sugar, and cinnamon. The combination of these ingredients brings warmth and rich flavors that embody the essence of baklava.
Step 3: Layer the Phyllo Dough
Layer half of the phyllo dough in the greased baking dish, brushing each sheet with melted butter. Don’t be shy—this buttery goodness is what creates those deliciously flaky layers!
Step 4: Add the Walnut Mixture
Spread the walnut mixture evenly over the phyllo. This is where the magic starts to happen, as the sweet and spicy nuts will create a fantastic contrast to the crispy layers above.
Step 5: Top with More Phyllo
Layer the remaining phyllo dough on top, again brushing each sheet generously with butter. You want to ensure each piece becomes wonderfully crisp during baking.
Step 6: Cut the Baklava
Using a sharp knife, cut the baklava into diamond or square shapes. This step not only helps with serving but also allows the syrup to seep into those sweet layers later on.
Step 7: Bake to Perfection
Bake for 50 minutes until the baklava is golden brown. As it bakes, your kitchen will fill with the enticing scent of toasty nuts and buttery pastry, making it nearly impossible to resist.
Step 8: Prepare the Syrup
Meanwhile, in a saucepan, combine water, sugar, honey, and vanilla to create the syrup. The synergy of these flavors will enhance each bite of baklava.
Step 9: Create the Sweet Glaze
Bring the syrup mixture to a boil, then reduce heat and simmer for 10 minutes. You’ll want to create a warm, pourable syrup that clings to the baklava.
Step 10: Drizzle with Syrup
Once the baklava is out of the oven, pour the hot syrup over it. The syrup will seep into the layers, creating that signature sticky sweetness we all love. Allow it to cool before serving, which will give those flavors time to meld.
Serving Suggestions & Pairings
Baklava is delightful on its own, but pairing it with a scoop of vanilla ice cream or a dollop of whipped cream takes it to another level. You could also serve it alongside a strong cup of coffee or mint tea to balance its sweetness.
Storage & Leftovers Guide
If you have any leftovers (which is a big "if"!), store baklava in an airtight container at room temperature for up to a week. Avoid refrigerating as it can make the layers soggy.
Kitchen Wisdom & Success Tips
- Make sure to keep the phyllo dough covered with a damp cloth while you work; it dries out quickly!
- If you’re feeling adventurous, try adding a pinch of nutmeg or using pistachios in place of walnuts for a different flavor profile.
- Remember to cut the baklava before baking—it helps with even syrup absorption.
Flavor Variations & Adaptations
Feel free to play around with the nuts! Almonds, pecans, or even a mix of your favorites can bring a whole new twist to this classic dessert. You can also incorporate some orange or lemon zest into the syrup for a refreshing citrus note.
Reader Questions & Solutions
- How do I know if my syrup is ready? The syrup should be slightly thickened after simmering. A good test is to dip a spoon in—if it coats the back, it’s ready!
- Why is my baklava soggy? This could be due to too much syrup or not cutting it properly before baking. Make sure to follow the steps closely!
- Can I make baklava ahead of time? Yes! You can prepare it up to the baking stage and store it in the fridge overnight, then bake it fresh the next day.
- What if I’m allergic to nuts? You can experiment with seed mixtures, like sunflower or pumpkin seeds, for a similar crunchy texture.
- How do I store baklava? Keep it in an airtight container at room temperature for up to a week, or in the fridge for up to two weeks if needed.
Wrapping Up
With just a bit of time and effort, you can create this irresistible baklava that captures the heart of your kitchen and the joy of sharing food. Remember, the best dishes come from the heart, and I hope you find as much joy making this baklava as I do. So roll up your sleeves, gather your ingredients, and let the sweet moments unfold! Happy baking!